Setting up a dropshipping store is an exciting venture, but one crucial detail that can make or break the customer experience is how you set up shipping. If you’re using the Syncee Premium Dropshipping Shopify app to source products from reliable suppliers, it’s vital to configure your shipping settings correctly. This ensures transparency, eliminates unexpected costs for your customers, and helps your store run smoothly.
In this comprehensive guide, we’ll walk you through everything you need to know about how to set up shipping when working with Syncee suppliers—whether you have one partner or many. We’ll show you how Shopify shipping setup works and provide actionable tips to help you avoid common mistakes.
Why Shipping Settings Matter in Dropshipping
Shipping isn’t just a backend detail—it’s a key element of your customer’s shopping experience. Whether they decide to complete their purchase may hinge on how fast the delivery is and what it costs. If your Shopify shipping set up is inaccurate or misleading, you risk losing customers or facing costly refunds.
When using the Syncee Premium Dropshipping app for product sourcing, it’s important to understand how the shipping responsibilities are divided. Syncee is a dropshipping app that imports product details to your online store and keeps them updated—but it does not handle shipping itself. That part is up to you, the store owner.
Syncee’s Role in Shipping: What You Need to Know
Syncee acts as a bridge between suppliers and your Shopify store, but it doesn’t manage the physical fulfillment of orders. This means:
- Syncee shows you shipping info provided by suppliers, but it does not transfer this data into your Shopify shipping settings.
- You must manually set shipping rates within your Shopify admin.
- Shipping rates must reflect the details provided by each individual supplier.
If you ignore this step, your customers may see incorrect rates at checkout, which can result in cart abandonment or confusion after orders are placed. That’s why it’s import to set up shipping properly.
Setting Up Shipping With One Supplier
Let’s learn how to set up shipping properly. Working with a single supplier simplifies the shipping setup process significantly. Here’s how to manage it correctly:
Step 1: Check the Supplier’s Shipping Info
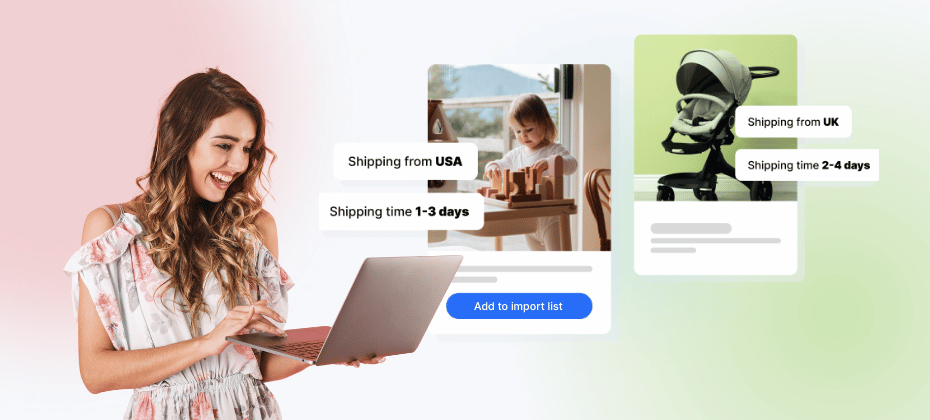
On Syncee, visit the product page or the supplier’s storefront. Click “See shipping details” to find:
- Shipping destinations
- Delivery times
- Cost per destination
- Additional rules if apply
This data is critical when determining how to set up shipping for your products.
Step 2: Decide on Your Shipping Strategy
There are two main ways to approach shipping:
Method 1: Include Shipping Costs in Product Prices
This approach lets you offer free shipping to your customers. Here’s how to implement it:
- In the Import List menu of Syncee, go to Settings > Pricing Rules.
- Add the supplier’s shipping cost on top of the product price with a fixed amount.
- Mark products as “free shipping” in Shopify.
This method is popular because customers love free shipping and it simplifies your rate setup.
Method 2: Set Custom Rates in Shopify
It’s the other approach to your setup. If you want to show shipping charges, go to Shopify Admin > Settings > Shipping and Delivery.
- Create a shipping zone based on where your supplier ships.
- Add rates that match the supplier’s shipping costs (flat rate, price-based, or weight-based).
- Save your changes.
This method allows greater flexibility and transparency in pricing, though it requires more maintenance.
Setting Up Shipping With Multiple Suppliers
If your Shopify store sources products from multiple suppliers via Syncee, to set up shipping is more complex—but still very manageable.
Step 1: Check the Supplier’s Shipping Info
On Syncee, go to the product page or open the supplier’s storefront. Click on “See shipping details” to access key information, including:
- Shipping destinations
- Delivery times
- Cost per destination
- Additional rules if apply
This information is essential when deciding how to set up shipping accurately in your Shopify store.
Step 2: Understand Supplier Variability
Each supplier may:
- Ship from different countries
- Use different couriers
- Have unique delivery times and charges
You need to reflect this diversity when you set up shipping in your Shopify store.
Step 3: Choose Your Setup Method
There are two main approaches:
Method 1: Use the Highest Shipping Rate
This is the easiest way to simplify things. Use the highest rate among your suppliers as a flat rate across your store.
Pros:
- Easy to manage
- Simple for customers to understand
Cons:
- Might overcharge some buyers
To implement:
- Go to Shopify Admin > Settings > Shipping and Delivery.
- Under General Shipping Rates, create your shipping zones.
- Add rates based on the most expensive shipping cost you’ve found in Syncee.
Method 2: Create Custom Profiles Per Supplier
This method is more precise and accurate but takes a bit more time and effort.
- Navigate to Shopify Admin > Settings > Shipping and Delivery.
- Click Create Shipping Profile.
- Name the profile (e.g., Supplier A).
- Add relevant products based on SKU or name.
- Define zones and rates based on the shipping info you saw on Syncee for your suppliers.
This method allows full control over your shipping rates and avoids overcharging or undercharging your customers.
Best Practices to Set Up Shipping
To make sure your customers enjoy a smooth and transparent shopping experience, it’s important to fine-tune your shipping setup thoughtfully. Below are several key strategies you can follow to configure your shipping settings effectively and avoid common issues along the way.
1. Regularly Review Supplier Info
Suppliers can update their shipping costs, or available delivery destinations at any time. That’s why it’s essential to regularly review the shipping information in Syncee. Always double-check the “See shipping details” section on the product or supplier page to make sure your rates in Shopify reflect the most accurate and current details. This helps you avoid undercharging customers or providing outdated delivery times.
2. Use Clear Language in Product Descriptions
Customers appreciate transparency. Make sure your product descriptions clearly mention whether shipping is free or charged separately. If additional costs may apply—especially for international orders—call it out. Being upfront about these details builds trust and reduces cart abandonment due to surprise fees at checkout.
3. Offer Multiple Shipping Options (if applicable)
When your suppliers offer different delivery speeds, consider reflecting those choices in your store. Providing standard and express options lets customers pick the delivery timeframe that best suits their needs and budget. It’s also a great way to improve the shopping experience and cater to different types of buyers, from those who prioritize price to those who value fast delivery.
4. Communicate Expected Delivery Times
Use the shipping estimates provided by Syncee suppliers to inform your customers about when they can expect to receive their orders. Include this information in your product pages and cart/checkout notes. Setting clear expectations helps reduce customer service inquiries and boosts satisfaction—especially if your store works with multiple suppliers who may ship at different speeds.
Common Mistakes to Avoid
Even experienced store owners can make mistakes when they set up shipping—especially when working with multiple suppliers or managing various shipping zones. Below are some of the most common pitfalls to be aware of, along with practical tips on how to avoid them.
Mistake 1: Assuming Syncee Automates Shipping Settings
Many new users believe that Syncee automatically configures shipping in Shopify. In reality, Syncee only provides reference data, and all actual settings must be handled in Shopify’s admin by the store owner.
Mistake 2: Forgetting to Match Shipping Zones
If your shipping zone doesn’t cover a country your supplier ships to, your product may be unavailable at checkout for that customer. Make sure your shipping zones match supplier destinations.
Mistake 3: Not Testing Checkout Experience
Always test your store’s checkout process using different products and shipping locations. This helps ensure the correct shipping fees appear and that customers won’t be surprised at checkout.
Summary and Next Steps
To set up shipping correctly in your Shopify store when using Syncee suppliers is critical to success. Whether you’re working with one supplier or several, the process involves:
- Manually configuring rates in Shopify
- Referencing supplier shipping info from Syncee
- Choosing between bundled pricing or individual shipping rates
- Creating zones and profiles tailored to your fulfillment strategy
By taking the time to configure your Shopify shipping setup correctly, you’ll avoid customer service headaches, maintain profit margins, and build trust with your buyers.
Ready to get started? Log into your Shopify admin, go to the Syncee Premium Dropshipping app, check your Syncee supplier’s shipping details, and set up shipping with confidence.
Frequently Asked Questions
Does Syncee automatically set up shipping rates in my Shopify store?
No, Syncee does not automatically configure shipping rates in your Shopify admin. While Syncee provides shipping information from suppliers for reference, it’s up to you to manually set up shipping within your Shopify account under Settings > Shipping and Delivery.
What’s the easiest way to set up shipping if I have multiple suppliers on Syncee?
The simplest method is to base your shipping rates on the highest cost among your suppliers and apply that universally across your store. This avoids undercharging customers but may result in slightly higher fees for some. For more accuracy, consider creating separate shipping profiles for each supplier in your Shopify admin.
Where can I find a supplier’s shipping costs and delivery times in Syncee?
You can view shipping details in Syncee by visiting a product’s page or the supplier’s storefront and clicking “See shipping details.” This section includes the countries they ship to, delivery time estimates, and shipping costs. Use this information when you set up shipping in your Shopify store.


